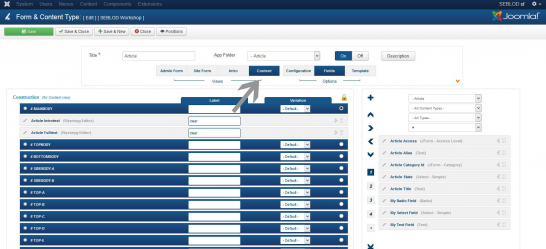
 At the top of the Form and Content Type editor interface for your Article, you will see a number of different "views". Each of these views corresponds to where your fields are displayed. Currently, our fields are displayed in the "Admin Form". However, if we toggle to the "Content" view, you'll see that only the Article Introtext and Article Fulltext are there.
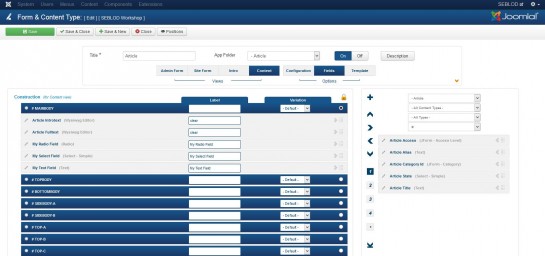 To add your new custom fields to the Content view, simply locate them on the right hand side in the list of available fields, and click the "<" arrow. To change the order that your fields appear in, you can drag and drop them in your desired locations.
Nachdem Sie nun Ihre ersten eigenen Felder erstellt und dem Joomla! Artikeleingabeformular hinzugefügt haben, möchten Sie die Werte die Sie dort eintragen im Frontend anzeigen. Diese Anleitung zeigt Ihnen wie Sie Benutzerdefinierte Felder Ihren Webseiten-Besuchern sichtbar machen.
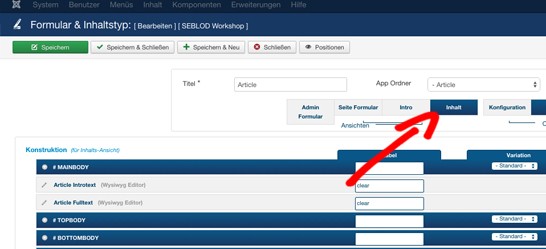
Im Inhaltstyp "Article" sehen Sie oben verschiedene "Ansichten" Jede dieser Ansichten legt fest, wo Ihre Felder angezeigt werden. Momentan werden unsere Felder im Admin Formular angezeigt. Wenn wir zur Ansicht "Inhalt" wechseln, sehen Sie dass nur die Felder "Article Introtext" und "Article Fulltext" anzeigt werden.
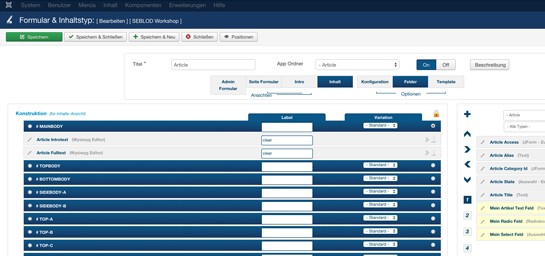
Um Ihre eigenen Felder in die Artikelansicht hinzuzufügen, suchen Sie diese einfach aus der rechten Seitenleiste und klicken Sie auf den "<" links Pfeil. Um die Reihenfolge der Felder zu ändern, können Sie diese per "Drag an Drop" an die gewünschte Position verschieben.
Um ein Feld zu entfernen, klicken Sie auf den grauen rechts Pfeil ">".
Nachdem Sie Ihre Felder hinzugefügt haben, klicken Sie auf "Speichern und Schließen"
Ihre Felder sind ab sofort im Frontend sichtbar, sofern Inhalte hinterlegt wurden.
Maintenant que vous avez créé vos premiers champs personnalisés et que vous les avez ajouté à un article Joomla!, vous voudrez afficher leurs valeurs du côté site ("front-end"). En d'autres termes, ce tutoriel vous montre comment rendre vos champs personnalisés visibles auprès des visiteurs de votre site Web.
Au-dessus de l'interface éditeur "Form and Content Type" de votre article, vous verrez un certain nombre de "views". Chacune de ces "vues" correspond à l'endroit où vos champs sont affichés. Actuellement, nos champs sont affichés dans "Admin Form". Toutefois, si on bascule sur le "Content view ", vous verrez que seul "Article Introtext" et "Article Fulltext" sont là.
Pour ajouter vos nouveaux champs personnalisés à la vue du contenu, il suffit de les localiser sur la droite dans la liste des champs disponibles, et de cliquer sur la flèche "<". Pour changer l'ordre dans lequel vos champs apparaissent, vous pouvez les glisser et les déposer aux emplacements souhaités.
Pour supprimer un champ, il suffit de cliquer sur la flèche ">".
Une fois que vous avez ajouté vos champs, cliquez sur "save and close". Vos champs seront désormais visibles du côté site ("front-end"), sur votre page de contenu si vos champs ont du contenu.